Upgrade your Pedalboard – 5 Tips that will take your Pedalboard to the next level?
Introduction
Are you ready to take your pedalboard to the next level? Maybe you’ve started with a simple setup, or perhaps you’re still rocking your very first board. But as you play more gigs and take on bigger performances, you might find yourself wanting something more professional. Does your pedalboard need to be gig- and tour-ready? We’ve got you covered with five essential tips to upgrade your pedalboard and make it truly shine.
These tips will transform your setup, making it more professional, consistent, and easier to set up and maintain. While some upgrades are budget-friendly, we’ll be upfront—others might be pricier and require careful consideration. Either way, they’re all worth thinking about if you’re serious about your sound.
Let’s dive into the first tip to upgrade your pedalboard! In our opinion, this is the foundation of any pedalboard upgrade when you’re ready to take gigging seriously: custom patch cables.
Upgrade your Pedalboard with Custom Patch Cables
Upgrading to custom patch cables is one of the biggest improvements you can make to your pedalboard—and for good reason! While store-bought patch cables can get the job done by connecting one pedal to another, they come with significant downsides that custom cables can easily solve.
The most notable advantage? Custom cables can be made to fit precisely to your needs. Whether you have a larger pedalboard with long cable runs (like an FX loop or unconventional pedal order), or you’re just looking for a tidier setup, custom cables are the way to go. They eliminate the stress of cables that are slightly too short and prevent the clutter caused by excess cable length. A neat and tidy board is not only aesthetically pleasing but also ensures your setup is more reliable during gigs.
Custom cables don’t stop at audio connections either—they can help keep your power cables organized and streamlined as well! By measuring your pedalboard layout and having cables built to the exact lengths needed, you can also select specific jacks (right-angled, flat, or straight) for an even cleaner look.
Downsides of Custom Cables
As with any upgrade, there are some downsides to consider:
- Cost: Custom cables aren’t cheap. While solderless kits like Pedal Patch can save money, fully custom-made cables from providers like Practical Patch come with a higher price tag. That said, the quality and precision are worth it if you’re serious about your rig.
- Limited Flexibility: Custom cables are tailored to your current pedalboard layout. If you decide to switch things up—like swapping a pedal with side-mounted jacks for one with top-mounted jacks—you might find some of your custom cables no longer fit. To mitigate this, consider ordering a few slightly longer cables as backups for potential future changes.
A Budget-Friendly Starting Point
If you’re ready to explore the world of custom patch cables but want to keep costs down, check out the Harley Benton Solderless Patch Cable Kit. It’s an affordable option that allows you to create five custom cables to fit your board perfectly. You can find more details and purchase it through our affiliate link below:
Get a Pedalboard Patch Box!
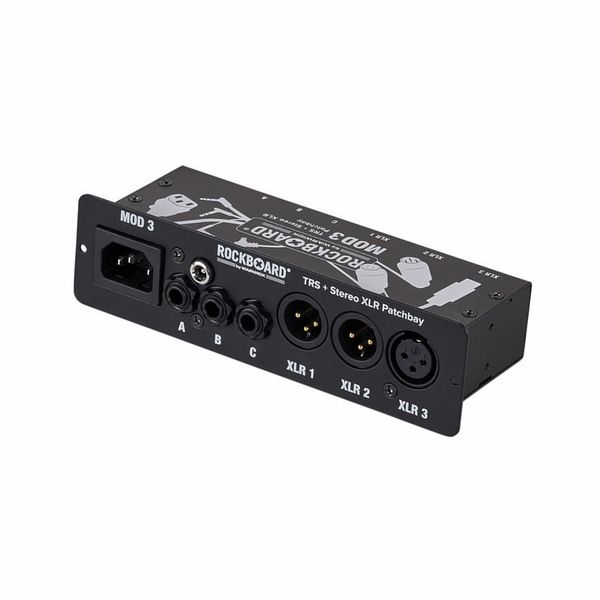
Looking for a faster and simpler way to set up your pedalboard? Consider installing a patch box! These handy tools streamline your rig by providing a central hub for all your pedalboard’s inputs and outputs. Instead of plugging cables directly into individual pedals, you connect them to the patch box, which serves as a single, convenient location for all your connections.
Patch boxes come in various shapes and sizes, but the most common configurations include:
- Basic: Input and Output (ideal for simple setups).
- Advanced: Input, Output, FX Send, and FX Return (great for more complex rigs).
Why Use a Patch Box?
The biggest benefit of a patch box is saving time. With a centralized connection point, setup becomes faster and easier, and even someone unfamiliar with your rig could set it up with minimal hassle.
Another major advantage is flexibility in pedal placement. You’re not limited to having your pedals in a specific order on your board. As long as your last pedal connects to the output jack, and your first pedal connects to the input, you’re good to go! This freedom allows you to arrange pedals however you prefer for aesthetics or functionality.
A Left-Handed Player’s Perspective
For left-handed players like me, a patch box can also help with cable management. By placing my input on the left side of the pedalboard, the cable naturally falls to my left, keeping it out of my way. Without a patch box, traditional right-to-left cable routing often means the cable crosses in front of me—a potential tripping hazard during performances!
Patch Box Recommendations
If you’re ready to add a patch box to your setup, here are a couple of excellent options:
"This means you can activate multiple pedals with a single press, allowing you to seamlessly switch between complex sounds without missing a beat!"
Upgrade your Pedalboard, Upgrade to a Switcher!
Is your pedalboard growing bigger and more complex? Do you find yourself constantly tap-dancing to switch between pedals during a performance? If so, it might be time to invest in a pedalboard switcher! These devices offer a ton of advantages, with minimal downsides beyond the initial cost.
What Does a Switcher Do?
A switcher allows you to plug your pedals into individual “loops.” You leave the pedal switched on, and the switcher controls when the pedal is engaged by activating its loop. Advanced switchers, like the GigRig G3, even let you program patches. This means you can activate multiple pedals with a single press, allowing you to seamlessly switch between complex sounds without missing a beat.
Why Should You Get a Switcher?
- Improved Pedal Placement: With a switcher, you’re free to place your pedals anywhere on your board—even underneath it! Since you won’t need to touch the pedals to turn them on or off, they can be arranged purely for aesthetics or convenience.
- Pedal Protection: By handling all switching from the switcher itself, you’ll reduce wear and tear on your pedals. No more stomping directly on them, which means less stress on the pedal mechanisms and jacks.
- Simplified Operation: Say goodbye to the chaotic dance of activating multiple pedals in quick succession. A switcher lets you activate your base sounds and swap between complex patches with a single press.
The Downsides
Switchers do have some drawbacks:
- Space Requirements: A switcher takes up significant room on your pedalboard and must be placed at the front edge for easy access.
- Potential Board Upgrade: If your current board is too small to accommodate a switcher, you’ll likely need to invest in a larger, possibly two-tier board to fit everything.
Switcher Recommendations
If you’re ready to take the plunge into the world of switchers, here are two great options:
- GigRig G3: The ultimate choice for professional-grade performance and functionality.
- Harley Benton Switcher: A budget-friendly alternative with the added bonus of a built-in power supply.
Check out the links below for more information and to find the right switcher for your needs:
Swap the Velcro for Mounting Tape

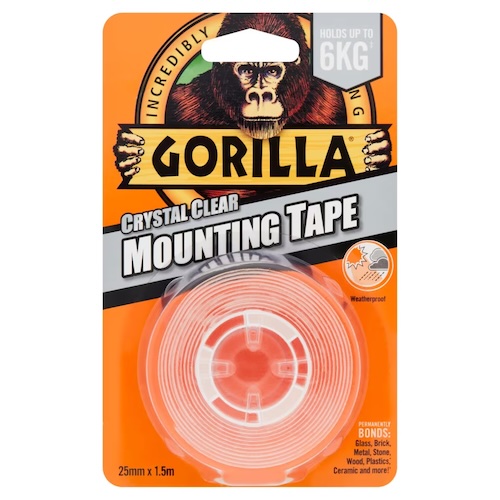
Here’s a tip you can use to upgrade your pedalboard that doesn’t get nearly enough attention, but it’s simple, affordable, and incredibly effective: swap out your Velcro for mounting tape!
Mounting tape provides a much stronger grip compared to Velcro, making it far less likely for your pedals to move or wiggle—especially crucial for touring and heavy gigging musicians. If you frequently transport your pedalboard, or if someone else handles your gear (like when it’s tossed into a plane’s cargo hold or packed in the back of a lorry), mounting tape ensures your pedals stay securely in place. In fact, they’ll be literally stuck to your pedalboard!
When to Use Mounting Tape
This solution is ideal for players who:
- Gig or tour heavily and need a rock-solid setup.
- Don’t regularly change their pedalboard configuration.
The Downside to Mounting Tape
As great as mounting tape is for stability, it does come with one major downside: removing pedals can be a challenge.Mounting tape is designed for permanent adhesion, so taking pedals off your board can require some effort.
If you like to frequently swap out pedals, this might not be the best option for your entire board. However, there’s a middle-ground solution:
- Use mounting tape for pedals you know will stay (like tuners, pitch pedals, or patch boxes).
- Stick with Velcro for pedals you might want to swap out later.
Pro Tip for Using Mounting Tape
To make removal easier while maintaining stability, apply only a small square of mounting tape on each corner of the pedal’s base. Avoid covering the entire base with tape—this way, the pedal will still be rock-solid but easier to remove when needed.
Invest in a Hard Case
If you’re gigging seriously or planning to tour, a hard case for your pedalboard is a must-have! A must when you are looking to upgrade your pedalboard. While a gig bag or soft case can work for casual use, regular travel demands a higher level of protection. A hard case shields your board, pedals, cables, and everything in between, giving you the confidence that your pedalboard will arrive at your destination exactly as you packed it.
Why Choose a Hard Case?
- Unmatched Protection: A hard case offers superior protection from bumps, drops, and heavy handling during transport. Whether it’s being loaded into a van, plane cargo hold, or stacked with other gear, your pedalboard will remain safe.
- Enhanced Transportability: Hard cases are far more versatile than soft cases when it comes to loading and stacking. You can place heavier gear on top of a hard case or slide it into tight spaces without worrying about damaging your board or pedals.
The Downsides of a Hard Case
As with any upgrade, hard cases come with some trade-offs:
- Increased Weight: All that protection adds heft to your gear. Be prepared for your pedalboard to feel significantly heavier.
- Cost: Professional hard cases, especially custom-made ones, can be expensive. While budget-friendly options for pre-made boards are available, fully enclosed custom cases often come at a premium.
Recommendations
If you’re looking for a budget-friendly option, check out hard cases for pre-made pedalboards on retailers like Thomann (find them using our affiliate link below). For ultimate protection, however, a custom-made flight case is the way to go.
Remember, pre-made hard cases are excellent for most setups, but custom cases provide that extra level of security and fit. Protect your gear and travel with peace of mind!
Conclusion
And there you have it—our 5 tips to upgrade your pedalboard and take your pedalboard from beginner to pro! Each of these upgrades is relatively simple to implement, but we’ll admit that some can be more costly than others. It’s up to you to decide which improvements are worth your time, money, and effort.
For example, swapping out Velcro for mounting tape is quick, affordable, and effective. On the other hand, getting custom cables made requires more time, money, and potentially a complete rebuild of your board. Similarly, investing in a hard case might not make sense unless you’re regularly gigging and traveling. Personally, I’ve yet to go the hard case route because my current gigging schedule doesn’t justify the added cost and weight.
Explore More Pedalboard Tips
Looking for more advice on how to upgrade your pedalboard? Check out our blog, where we’ve covered plenty of pedalboard-related topics. Whether you’re just starting out or refining your professional setup, you’ll find something to help elevate your rig.
If you have any questions about your pedalboard, don’t hesitate to reach out! Drop us an email, and we’ll do our best to assist you.
If you want to support the site then please give us a follow on Instagram and subscribe to our YouTube.
Check out our other Articles here


